Saturday, July 24, 2010

Amazing Gorgeous People.....

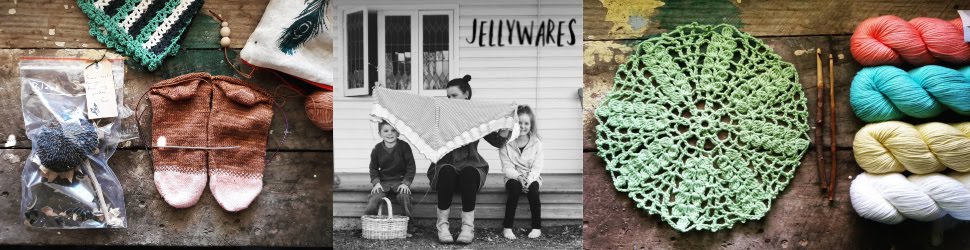
Bloggers often ask me how my new shop is going, it's FANTASTIC!!!!! This morning as I was setting up for the day I thought a little virtual tour might be nice....
If you happen to stumble across Cobar in your travels you're in for a real treat.... We have some gorgeous little shops and I'm lucky enough to be one of them... My little shop is one of the oldest (if not the oldest) that is still in 'almost' original condition.... I just love its rustic charm and wouldn't of opened a shop any where else... Every morning I open this sign is hung.....(picture courtesy of Penny)
You can usually find rusty buckets filled will freshly picked fruit just outside the door, trying their hardest to lure you through..... Today we have a bounty of Mandarins, yumm-o!!!!
(picture courtesy of Penny)
When you step inside, right up the back of the room, nestled in behind the counter is where you'll usually find me 'click, click, clicking' away at my latest knitting project.....(picture courtesy of Penny)
And the view from where I sit is pretty darn sweet.....
Even if I do say so myself.... *^_^*
Can you now see why I love coming to work???? The part that you might not see though, which would have to be my most favourite, is where I get to spend my time 'chatting' with all of the amazing, gorgeous people that walk through my door... Be it locals, tourists or fellow bloggers the stories that we share are inspiring....

So maybe, one-day, you might just get the chance to pop by for a chat too (that is if you haven't already)....
(picture courtesy of Penny)
Hugs........ Jodie xx-xx

Monday, July 19, 2010

Super Simple Hat Pattern How-To

Hats, hats and more HATS!!!! Yes, that's right, with the cold weather there comes a need for head warming devices and to be honest I've lost count of the number of hats I've made this Winter... I made the pattern up for the little blue number below and its been a great 'go-to pattern' ever since. It's so simple to create and whips up in less than an hour, perfect for last minute gift giving.. I thought I'd share my super simple hat how-to with you all.....Step 1
First arm yourself with the tools needed, I used well under 1/2 a skein of Magnum 20ply pure wool (available in my store but not on-line as yet) and some 10mm bamboo needles (a 50cm circular and dpn's).
Step 2
Measure your head in inches and cast-on 2 stitches for every inch, mine was 22 inches so I cast-on 44sts. My most favourite cast-on method is the long-tail, but use what ever works for you.
Step 3
If you want the end of your hat to roll up you can skip this step but if you want a brim continue on..... For the hat above I've worked in garter stitch (knit 1 round, purl 1 round) for 6 rounds but you could just as easily work in a rib pattern for the brim. For a K1, P1 ribbing, cast on 2sts less then required, then increase to the correct # of sts after the ribbing. For a K2, P2 rib, cast on 4sts less then required, then increase to the correct # of sts after the ribbing. 6 rounds for a brim in this chunky wool is plenty.
Step 4
Once you have completed your brim you will need to work in stocking stitch for approx 6-7 inches before starting your decrease. My hat measured 6 1/2 inches from the cast-on edge before I started my decrease. Try the hat on as you're making it if you're unsure, this always seems to work for me...
Step 5
Time to decrease.... This is super easy, change to your dpn's and work as follows...
Round 1 - *K2, k2tog repeat from * round.
Round 2 - Knit 1 round without decreasing.
Round 3 - *K1, k2tog, repeat from * round.
Round 4 - Knit 1 round without decreasing again.
Round 5 - K2tog all the way round.
Round 6 - repeat round 5.
Step 6
To finish your hat off cut your yarn leaving about a 6 inch tail, thread this tail back through your live stitches and pull tight. Sew in the ends, add a flower and your done.
This hat is that super simple that I've had my beginner knitters working on them and they're even managing to finish 1 in a lesson, gotta love the instant gratification of something like that.... Here's hoping you're keeping your head warm where you are - :P
Hugs...... Jodie xx-xx

Yarn Hint - If you are unable to find any 20ply, or are just wanting to use up some yarn from your stash and have no 20ply, you could always knit with several yarns held together to get the same gauge. I've made the same hat using 3 x 8ply's held together and it's created the same gauge of 2sts per inch. Hope this helps...

Friday, July 16, 2010

Rusty Cut-Outs....

I really loved getting down and dirty in DH's shed the other day making those wooden buttons. So while the going was good I tried my hand at another task I've had on my 'to do' list for quite some time : : Rusty Tin Cut-Outs.....
Armed with a pile of rusty old corrugated iron from our farms original old homestead and a pair of very sharp well lubricated (this is essential) tin snips I set to work...
I used a nail to scratch out the outline for the ducks before cutting but the stars and hearts were all done free-hand....
Next I'm going to have a go at knitting needles and crochet hooks, boy, you could really have fun with this!!! :P
Hugs..... Jodie xx-xx

Tuesday, July 13, 2010

Wooden Button How-To

A couple of weeks back I collected some hardwood sticks from around the farm in the hopes of one day soon trying my hand at button making.... Well, today was that day..... With rain bucketing down I sort refuge in DHs shed and set to work....
I used a hand saw to cut my buttons but you could just as easily use an electric type of saw such as a jig-saw. After a little trial and error I found the best thickness to cut my buttons was between 3-5mm (thinner is fine but it just makes it a little tricky to hold onto while sanding).
Your next step is to sand and wax each of your disks. The wax will help to protect your buttons and besides that I just love the way it makes the natural grain of the timber stand out....
Now drill a couple of holes, I went for 2 but you could just as easily do 4 if that's what you prefer, and you're done..... How easy was that????? If you're anything like me you'll be making oodles of these babies and if you do I'd love to hear how you go....

Sunday, July 11, 2010

Circle-y Granny Tutorial.....

I just love making Granny Squares but last night I was in the mood for something a little different..... Seen as thought it's been a really long time since I did a tutorial I thought I'd do one for my new 'Circle-y Granny'......
This square is super doper easy and was designed with beginners in mind.... You'll need 4 colours of yarn (go wild here, the more colour the better :P) and a hook to match.... I'm using 8ply Color Works from Heirloom in a blue, pink, green and brown and a 3.5mm hook as I tend to crochet loosely (I wanted this square to be fairly tight)....

I'm writing this pattern in U.S terms. A good stitch converter if you need it can be found here (scroll down a little to find it)....


LETS GET STARTED!!!!!

Attach your first yarn to your hook using a slip knot. Chain(ch) 5. Slip stitch(sl st) into the 5th chain from hook to form a ring. The ring will be very small but don't worry, once you start working into it it'll free up and you will find it plenty big enough.

Next, ch 3. This ch 3 will count as your first double crochet (dc). You now need to work 11 dc into the ring (12 dc in total including your ch 3).
Join with a sl st into the 3rd ch of your starting ch3. You have now finished your first round and it's time to change colours. Cut your yarn, pull it through the loop, from back to front, and pull tight. You've now fastened off...
Attach the next colour to your hook with a slip knot. Sl st to the top of any of the dc's from the first round making sure you insert your hook under both loops like so.
Your new colour yarn is now attached.
Ch3.
Dc1 into the same space.
Dc2 into the top of each dc round (24 dc in total including starting ch3).
Join with a sl st to the top of your starting ch3. You have now finished round 2, time for another colour change. Cut your yarn and fasten off. Attach the next colour (same as before). Ch3, dc1 in same space. Dc1 in next dc.
(dc2 in next dc, dc1 in next dc) repeat round (36 dc in total including starting ch3).
Join with a slip stitch to the top of the starting ch3 and fasten off.
Now it's time to turn our circle into a square. Join a new colour (same as before) and chain 3.
Work the first corner, (dc1, ch2, dc2) all in the same space (where your sl st and ch3 are). We are now going to work our first straight edge. Dc in next dc, half double crochet (hdc) in the next dc, single crochet (sc) in each of the next 4 dc, hdc1 in the next dc, dc1 in the next dc. Have I lost you yet??? Hang in we're nearly done...Work your next corner, (dc2, ch2, dc2) all in the next dc. Work another straight edge as follows; dc, hdc, sc1 in each of the next 4 dc, hdc, dc. Continue working round until you have 4 corners and 4 straight edges worked.
Join with a sl st to starting ch3. For the next round we are going to continue working in the same colour so don't fasten off. Sl st in the next dc and then into the first corner space. Ch3.
Work the first corner. (dc1, ch2, dc2) all in the same corner space.
Miss the next dc, dc in each of the next 11 dc.Work the next corner. (dc2, ch2, dc2) in the next corner space.
Continue round until you've worked 4 corners and 4 straight edges. Join with a sl st to the top of the starting ch3, cut yarn and fasten off.
You have now finished your first Circle-y Granny.....

How did you go???? Did you make it????? Wasn't that hard now was it???? I'd love to see any pics if you give this super simple granny a go...

Hugs............... Jodie xx-xx

Friday, July 9, 2010

Peasant Dress.......

Last night with visions of yummy homemade dresses in my head I set to work creating something new for my wardrobe... I had a box full of DHs old button up shirts and some bargain buy '$2 a metre' heavy weight fabric from Spotlight's end of Winter sale last year and after a few snips here and even more there...The 'Peasant Dress' was born........ Teamed up with my new Noro scarf it made the perfect outfit for my shop today... :) I'm now busily crocheting away on another scarf using some of the gorgeous Cascade Chunky Super-wash that came in this week.... Cascade really has hit the nail on the head with this yarn, it's an absolute dream to knit with!!!
What's hot on your needles (hook) at the moment???
Hugs............ Jodie xx-xx

Tuesday, July 6, 2010

Today I'm.....

Putting the finishing touches on some new gloves made using the gorgeous 8ply Heirloom Alpaca I have in my shop..... Along with finally getting the chance to picture a super simple slouchy hat I made a fortnight ago (pattern particulars here)....
And thanks to the generosity of a gorgeous neighbour I am now in the possession of oodles of oranges destined to be made into mouth watering Orange Jam....
What are you doing today???

Hugs............. Jodie xx-xx

Spring Seed Swap?

I had big plans of sharing a late Winter garden update with you all this post, full of beautiful pictures of Wintry produce such as peas (...